If you’ve ever driven down a residential street after dark and noticed those sleek, self-sufficient lights that don’t have visible power lines running to them, you’ve seen an integrated solar street light. As someone who’s spent the last seven years as part of a team that designs, manufactures, and ships these lights to communities, small businesses, and municipal projects across North America, I get it—when you’re looking to light up a parking lot, a rural driveway, a small park, or even a remote construction site, it’s tempting to think, “Can I just install this myself?” Integrated Solar Street Light
I’ve heard this question a hundred times, from weekend homeowners testing their handyman skills to maintenance managers at small towns trying to stretch tight budgets. The short answer is: it depends. And since I’m not here to sell you a line that’s either too vague or too pushy, I’ll break this down from the perspective of someone who’s installed hundreds of these units, troubleshot thousands of customer issues, and knows exactly where the line between “DIY doable” and “professional help needed” falls.
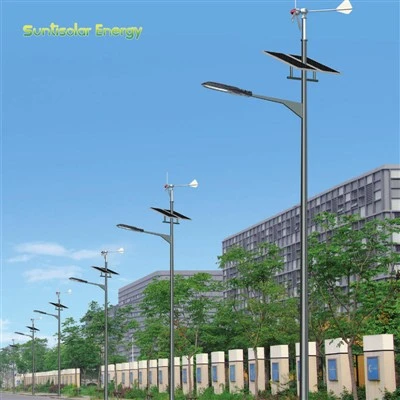
First, let’s get clear on what an integrated solar street light actually is, because this definition is key to answering the DIY question. Unlike traditional street lights that need a grid power line, a separate solar panel mounted somewhere else, a battery bank, and a controller box all wired together, an integrated unit combines all those parts into one compact, weather-sealed housing. The solar panel, battery, charge controller, LED light head, and sometimes even a small backup battery for extra cloudy days are all built into the pole itself. That’s why you don’t see messy wires sticking out, and that’s also why it feels like something you could plug in and set up—there’s no complicated on-site wiring, which is a huge design win for us as suppliers. That said, simplicity doesn’t equal zero skill.
Let’s start with when installing an integrated solar street light by yourself makes sense. This is almost always the case if you’re working on a small, low-stakes project. A 10-foot pole for a residential driveway, a 12-foot light for a small backyard patio, or even a pair of 15-foot units for a community garden plot—these are projects that most handy people can tackle with basic tools, no formal training required.
But wait, before you grab your drill and head to the hardware store, let’s outline what you actually need to do for a DIY install, so you can judge if that’s within your skill set. First, site assessment. You can’t just plop a solar light anywhere. It needs six to eight hours of unobstructed direct sunlight a day—no trees, tall fences, or nearby buildings blocking the panel. We’ve had customers call us complaining their lights only last 4 hours on a cloudy night, and 9 times out of 10, the issue is they mounted it under an oak tree that shades the panel until mid-afternoon. So step one: walk your site at solar noon (usually 12:00 to 2:00 PM local time) for a full day, and mark where the sun hits the ground steadily. If that spot is within a few feet of where you want the light, you’re good.
Next, the base. Integrated solar street lights don’t need a concrete vault like traditional grid-tied lights, but they do need a stable foundation to stop them from tipping over in wind. For small to medium poles (10 to 18 feet), the standard DIY method is a 12 to 18-inch deep hole, filled with concrete or even compacted gravel if your soil is well-drained and you’re in an area with wind speeds under 40 mph. You’ll need a post hole digger (or a rented auger if you don’t want to swing a tool all afternoon), a level, and enough concrete to fill that hole. That part is straightforward for anyone who’s put up a fence post or a deck rail.
Then, putting the pole together. Most of our DIY-ready units come pre-assembled at the factory—you don’t have to wire anything, because all the internal connections are tested before they leave our warehouse. All you do is attach the pole to the base anchor (we include a pre-drilled mounting plate and lag bolts for this), adjust it level with your wrench, and wait for the concrete to cure if you used it. The light head itself is either pre-tilted to face the direction you want or has a simple knob to adjust the angle, so you can point the light exactly where you need it—no electricity required for that adjustment, either.
The big catch here? If your project is larger than that, DIY gets way trickier. Let’s say you’re planning a 20-foot pole for a small parking lot, a set of four lights for a town common, or a unit for a road that sees heavy traffic. Now you’re dealing with deeper, wider foundations, sometimes 3 feet or more, because taller poles need more stability to stand up to wind. You might need to rent a small crane to lift the 100+ pound pole into the hole, which requires a driver with a commercial license to operate it safely—something most DIYers don’t have access to.
Then there’s regulatory stuff I always warn people about, regardless of project size. I’ve had a customer in a rural area tell me he installed a light for his private road, and that’s fine, but a guy 50 miles away tried to put the same unit on a public road and got a fine from the county because he didn’t submit a lighting plan for review. Even if the light is solar, local governments, neighborhood associations, or state transportation departments usually have rules about how bright the light can be, where it can be mounted, and how far it has to be from property lines or crosswalks. For small projects, this might just mean a quick call to your city planning office. For larger projects, you might need an electrical inspector to sign off on the install—even if there’s no grid power. That’s not a DIY job for most people.
Another thing to consider: maintenance and warranty. As a supplier, we stand behind our products, but the warranty is only valid if the unit is installed correctly. If a DIYer installs it on uneven ground that makes the panel not tilt properly, causing it to only charge half as fast, we can’t cover that damage under warranty. If a pole tips over in wind because the hole wasn’t deep enough, that’s user error, not a product defect. For small, personal projects, that risk is usually worth it. For projects where you’re counting on the light to be reliable year-round, or where you have a lot of money invested, paying a professional to install it is a small cost to avoid headaches.
I also know a lot of people worry about cost, which is why DIY feels like the only option. A professional installer might charge $200 to $500 per light, which on top of the $300 to $800 cost of the unit itself, adds up. But here’s the thing: integrated solar lights are designed to be low-maintenance. Once they’re installed right, you might only need to clean the panel once a year and replace the battery every 7 to 10 years. That’s way less than the cost of running grid power to a traditional light, which can be thousands of dollars per unit just for the wiring, not to mention the monthly electric bill. So if you can do the install yourself, that’s a huge savings, but only if you’re comfortable with the physical labor and have the right tools.
Let me share a quick story to make this real. Last year, I met a guy named Mike in Ohio who installed four 18-foot lights in his small neighborhood park by himself. He’s a retired carpenter, so he’s used to digging holes and working with his hands. He watched our installation video (we have a free, step-by-step video for every unit that sells, by the way), got his post hole digger, concrete, and level, and finished the whole project in one Saturday. He called me a month later to say how happy he was—his park is lit up every night, no electric bill, and he saved almost $1,500 on installation. Then a few months after that, he called to say he needed help adjusting the light heads because one was pointing too close to his house, and he wasn’t comfortable climbing the ladder to fix it. That’s the kind of call we love to get—we help him adjust it, no extra charge, because he did the hard part right.
On the other side, we had a customer in Texas who tried to install a 20-foot pole for his farm road by himself. He rented an auger, dug a hole, put the pole in, and filled it with gravel. A week later, a 50 mph gust of wind came through, and the pole tipped over, cracking the light head. He tried to call us for a warranty replacement, but we had to turn him down because his foundation wasn’t deep enough for a 20-foot pole in Texas’ wind patterns. He ended up hiring a professional to install a new one, which cost more than he saved by DIYing the first time. That’s the mistake I want people to avoid.
So, to circle back to the original question: Can you install an integrated solar street light by yourself? If your project is small (under 18 feet tall, private property, unobstructed sun), you have basic handyman skills, access to simple tools, and you take the time to learn the exact steps for your unit (we have all that info online, and our team is happy to walk you through it), then yes. If your project is larger, on public property, in an area with high wind or heavy traffic, or you don’t have experience digging large holes or working with tall structures, then hiring a licensed installer is worth the investment.
And for anyone who’s reading this and thinking about their next lighting project—whether it’s for a small business, a community space, or a rural road—we don’t push you to buy more than you need. If you tell us you’re planning to DIY, we’ll point you to our lines designed for easy installation, send you the full installation guide, and answer any questions you have. If you tell us you need professional help, we can connect you with installers in your area who have experience with our products, so you don’t have to hunt for someone who knows how to handle solar units.

At the end of the day, integrated solar street lights were invented to make outdoor lighting accessible to everyone, not just big cities with big budgets. Whether you install it yourself or bring in help, the goal is to get reliable, affordable lighting that works for your space. If you’re ready to plan your project, whether it’s 1 light or 50, we’re here to help you figure out the best way to get it done.
Solar Street Light References
- International Dark-Sky Association. (2022). Outdoor Lighting Guidelines for Residential and Commercial Properties. Retrieved from industry best practice reports on dark sky friendly lighting design
- North American Electric Reliability Corporation. (2021). Off-Grid Solar Installation Safety Standards for Small-Scale Projects. Technical Brief for Low-Voltage Solar Systems
- U.S. Department of Energy. (2020). Solar Street Light Maintenance and Installation Guide for Municipal and Private Use. Federal Energy Management Program Publication
- American Association of State Highway and Transportation Officials. (2022). Guidelines for Solar-Powered Lighting on Public Roadways. Roadside Equipment Design Standards
Yantai Xutai New Energy Technology Co., Ltd.
Yantai Xutai New Energy Technology Co., Ltd. is one of the most professional urban road integrated solar street light manufacturers and suppliers in China. With a professional production team, we are able to meet the needs of the majority of our customers. Please rest assured to buy premium urban road integrated solar street light made in China here from our factory.
Address: No.229, Tongshinan Road, Zhifu District, Yantai City, Shandong Province, China
E-mail: Joe.chu@suntisolar.com
WebSite: https://www.suntisolar.com/
